Do you run a WooCommerce store and want to send order notifications on WhatsApp?
If yes, this guide is for you. By the end of it, you’ll know exactly how to send WhatsApp notifications for WooCommerce orders using the official WhatsApp Business API.
But first, let’s quickly look at the different ways this integration can benefit your store.
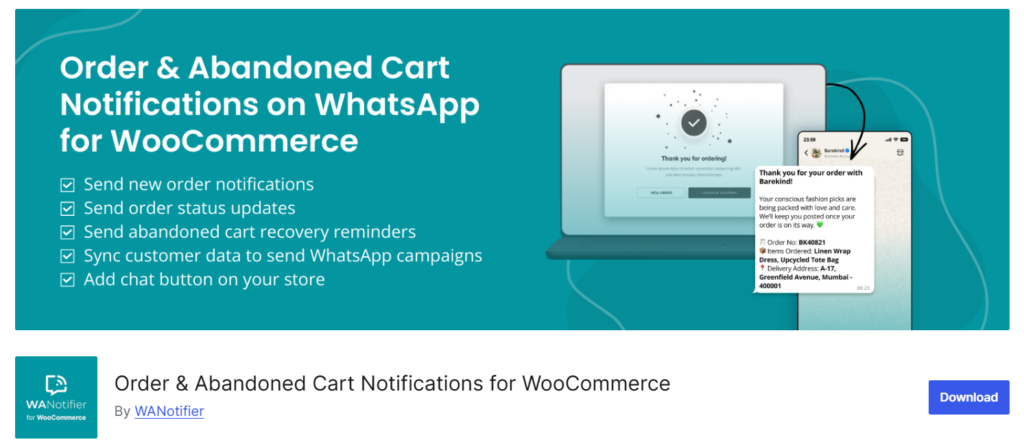
Install WANotifier's Order Notifications for WooCommerce Plugin
Or click here to download the plugin and install it manually!
Benefits of Integrating WooCommerce with WhatsApp
Once you integrate WhatsApp with your WooCommerce store, you change how customers place orders and interact with your business.
From faster communication to fewer support tickets, better cart recovery, and even higher revenue, the impact can be bigger than most store owners expect.
Let’s break these benefits down.
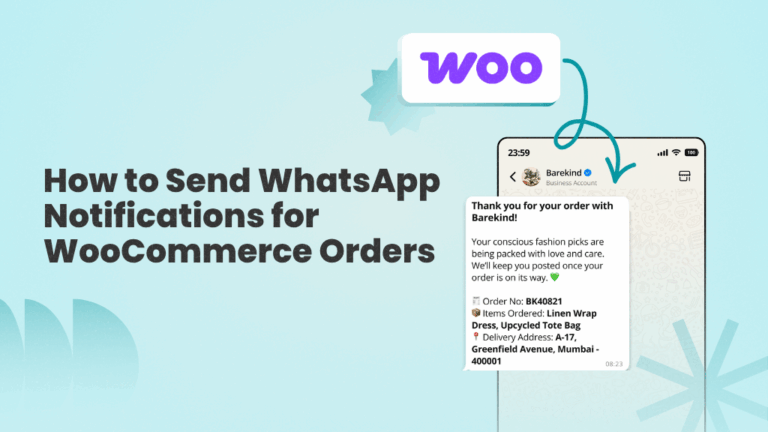
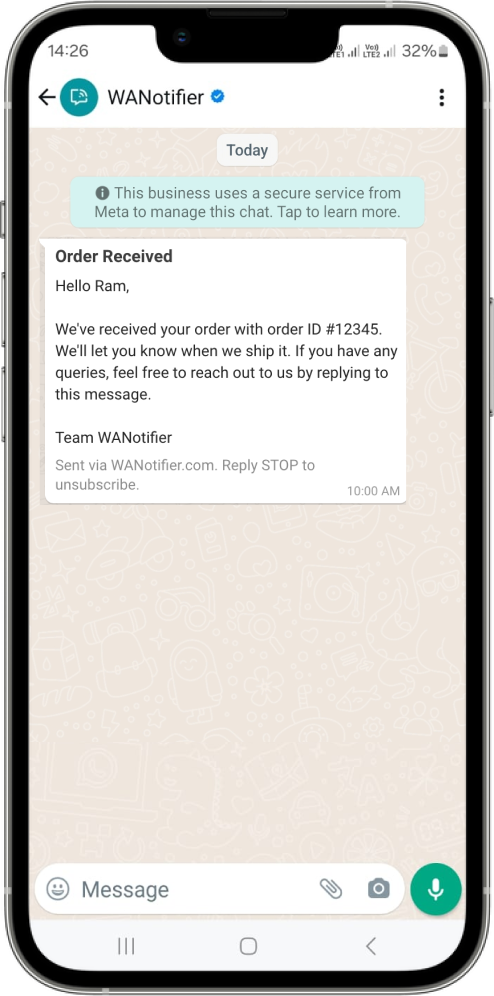
1) Timely and relevant customer communication
When someone places an order, they usually want an immediate confirmation, a payment update, an estimated delivery timeline, or even a delay alert if something goes wrong.
WhatsApp is incredibly useful here because it lets you send these updates at the exact moment they matter.
It also helps that you can personalize WhatsApp messages with details like the customer name, order ID, product name, location, tracking link, and other order-specific information, so that they feel more relevant (and more likely to be opened by customers).
2) Higher engagement than email and SMS
With over 3 billion monthly active users and open rates of up to 90%, WhatsApp offers a level of visibility that email and SMS simply can’t match.
WhatsApp also allows two-way communication, meaning customers can reply to your messages instantly and ask questions about their order or delivery timelines, request changes, confirm details, or clarify payment issues, all within the same chat thread.
3) Reduced support queries
Many customer support messages come down to simple questions:
- “Did my order go through?”
- “Has my order been shipped?”
- “When will it arrive?”
When you automate order updates through WhatsApp, these questions come up far less often.
Beyond order updates, WhatsApp also lets you automate routine customer queries about product availability, pricing, or store hours, using chatbots and auto-replies. This allows you and your team to spend less time repeating the same information and focus on higher-value conversations.
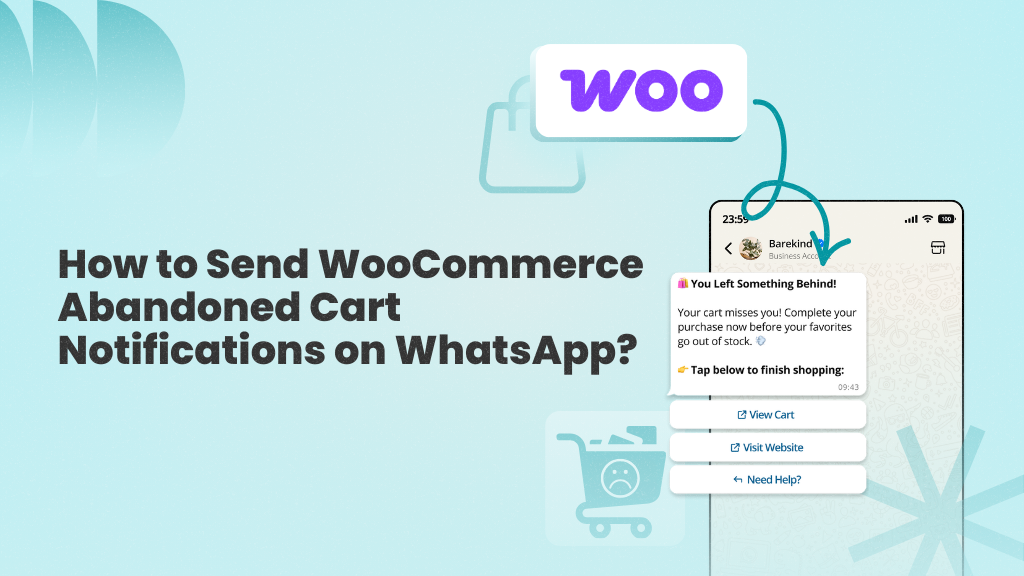
4) More effective abandoned cart recovery
Cart abandonment is a common challenge for WooCommerce stores, and while many businesses try to recover lost carts with email reminders, those messages often go unnoticed.
With WhatsApp, however, you get higher visibility and reach, meaning your reminders are more likely to be seen and acted upon by customers.
Now that you know what integrating WooCommerce with WhatsApp can do for your store, let’s look at what you actually need to get started.
Requirements for Integrating WooCommerce with WhatsApp
To connect your WooCommerce store with WhatsApp and start sending order notifications, you need two things:
- Access to the WhatsApp Business API: The API allows you to connect your WooCommerce store with WhatsApp and send automated notifications, such as order confirmations, shipping updates, and abandoned cart reminders, at scale.
- A WhatsApp marketing and automation platform, like WANotifier: The API does not come with a built-in dashboard or user interface that you can use directly. To access its features, you need a platform that connects your WooCommerce store to the API and provides ready-to-use tools to create and send messages, set up chatbots and automations, manage message templates, and more.
Let’s quickly understand what the WhatsApp Business API is, and then look at how a platform like WANotifier not only gives you access to it but also equips you with the tools to turn your WooCommerce store into a revenue-generating engine.
Brief introduction to the WhatsApp API
The WhatsApp Business API is a programmatic solution by Meta that allows businesses to send messages to their customers at scale.
Unlike the regular WhatsApp app or WhatsApp Business app, which are designed for manual, 1:1 messaging, the API is built for automation and large-scale messaging, and geared toward businesses that want to:
- Schedule and send WhatsApp campaigns to thousands of contacts at a time
- Automate conversations using chatbots and auto-replies
- Connect WhatsApp with existing tools like their website, forms, CRM, or eCommerce store (such as WooCommerce)
…and do much more.
In short, if you want to send automated WooCommerce order notifications on WhatsApp, the API is what makes it possible.
If you’d like to dive deeper, you can read our in-depth guide on the WhatsApp Business API.
Why Use WANotifier to Integrate WooCommerce with WhatsApp?
As mentioned earlier, the WhatsApp Business API does not include a dashboard or user interface, and to get any use out of it, you need a third-party platform or API provider.
There are many providers in the market. However, many of them tend to fall into one of the following categories:
- They are multi-channel platforms without a dedicated WhatsApp plan, which means you may end up paying for features or channels you don’t really need.
- They add a 12% to 25% markup on WhatsApp’s official messaging charges (learn more about them here), which can significantly increase your overall costs over time.
This is where WANotifier comes into play.
An official Meta Tech Partner, WANotifier offers a dedicated WhatsApp marketing and automation platform that includes everything you need to manage the entire customer journey on WhatsApp.
The best part is that it offers all this with 0% markup on WhatsApp API charges and transparent pricing that scales with your business.
On top of this, WANotifier offers responsive customer support via email and chat, step-by-step onboarding assistance for setting up the WhatsApp Business API, and a 7-day free trial on all plans.
Now that you know why WANotifier is one of the most cost-effective ways to integrate your WooCommerce store with WhatsApp, let me show you how it works in practice.
How to Send WhatsApp Notifications from WooCommerce using WANotifier?
Integrating WooCommerce with WANotifier to send WhatsApp notifications is fairly straightforward. Just follow the steps below to get started.
Step 1 – Create your WANotifier Account and Set Up Your Phone Number with the WhatsApp API
The first step is to create your WANotifier account and connect your phone number with the WhatsApp Business API. You can follow the instructions in the article below to complete this process.
>> Create your WANotifier account and set up the WhatsApp API
Note that if you’re already using the WhatsApp Business App, you don’t need to start from scratch. WANotifier supports the Coexistence feature, which allows you to upgrade your existing number to the WhatsApp Business API while continuing to use the mobile app. You can learn more about it here.
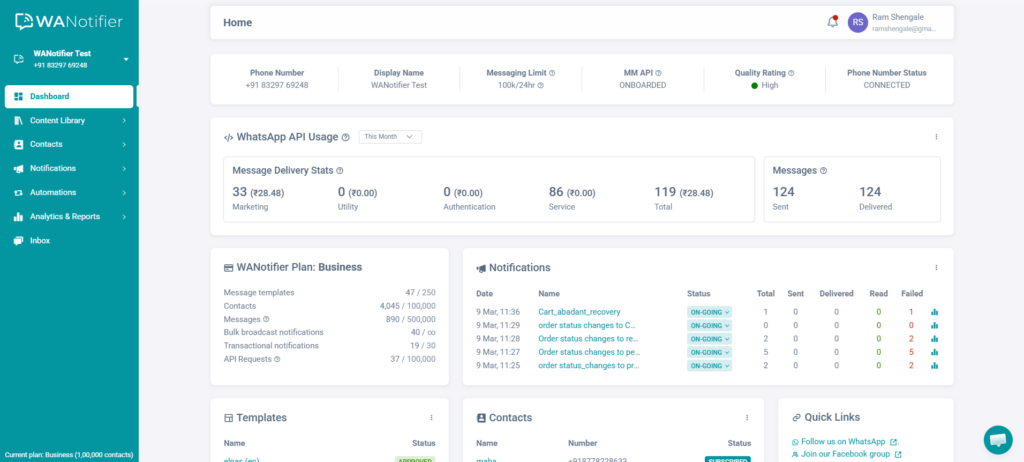
Once your account is set up and your number is successfully connected to the API, you’ll automatically be redirected to your WANotifier dashboard.
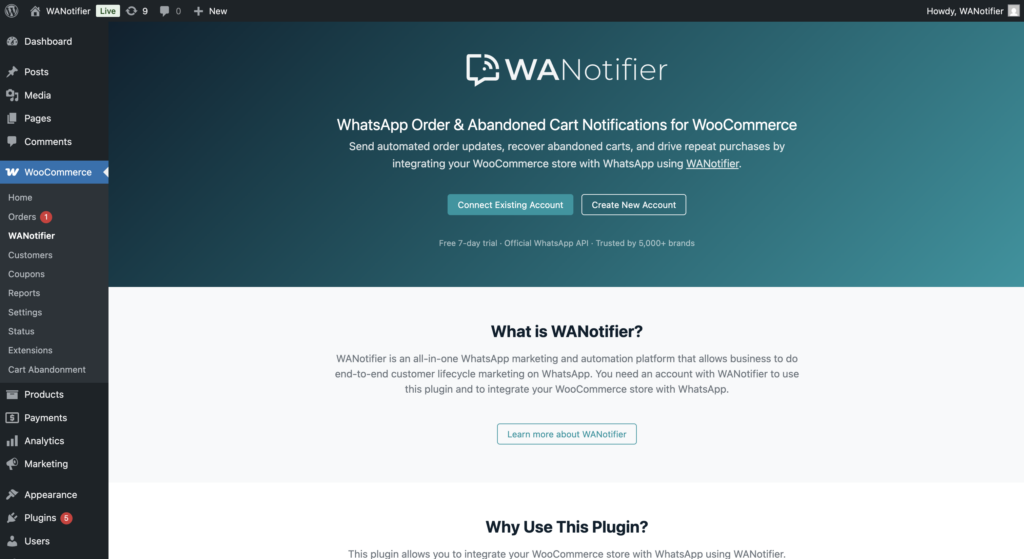
Step 2 – Install and Activate Our WooCommerce Integration Plugin
Next, download and install our WooCommerce integration plugin on your WordPress website.
This plugin will enable you to connect your online store to WANotifier and automatically trigger WhatsApp notifications for specific events, such as when a new order is placed or the order status changes (for example, to Processing or Completed).
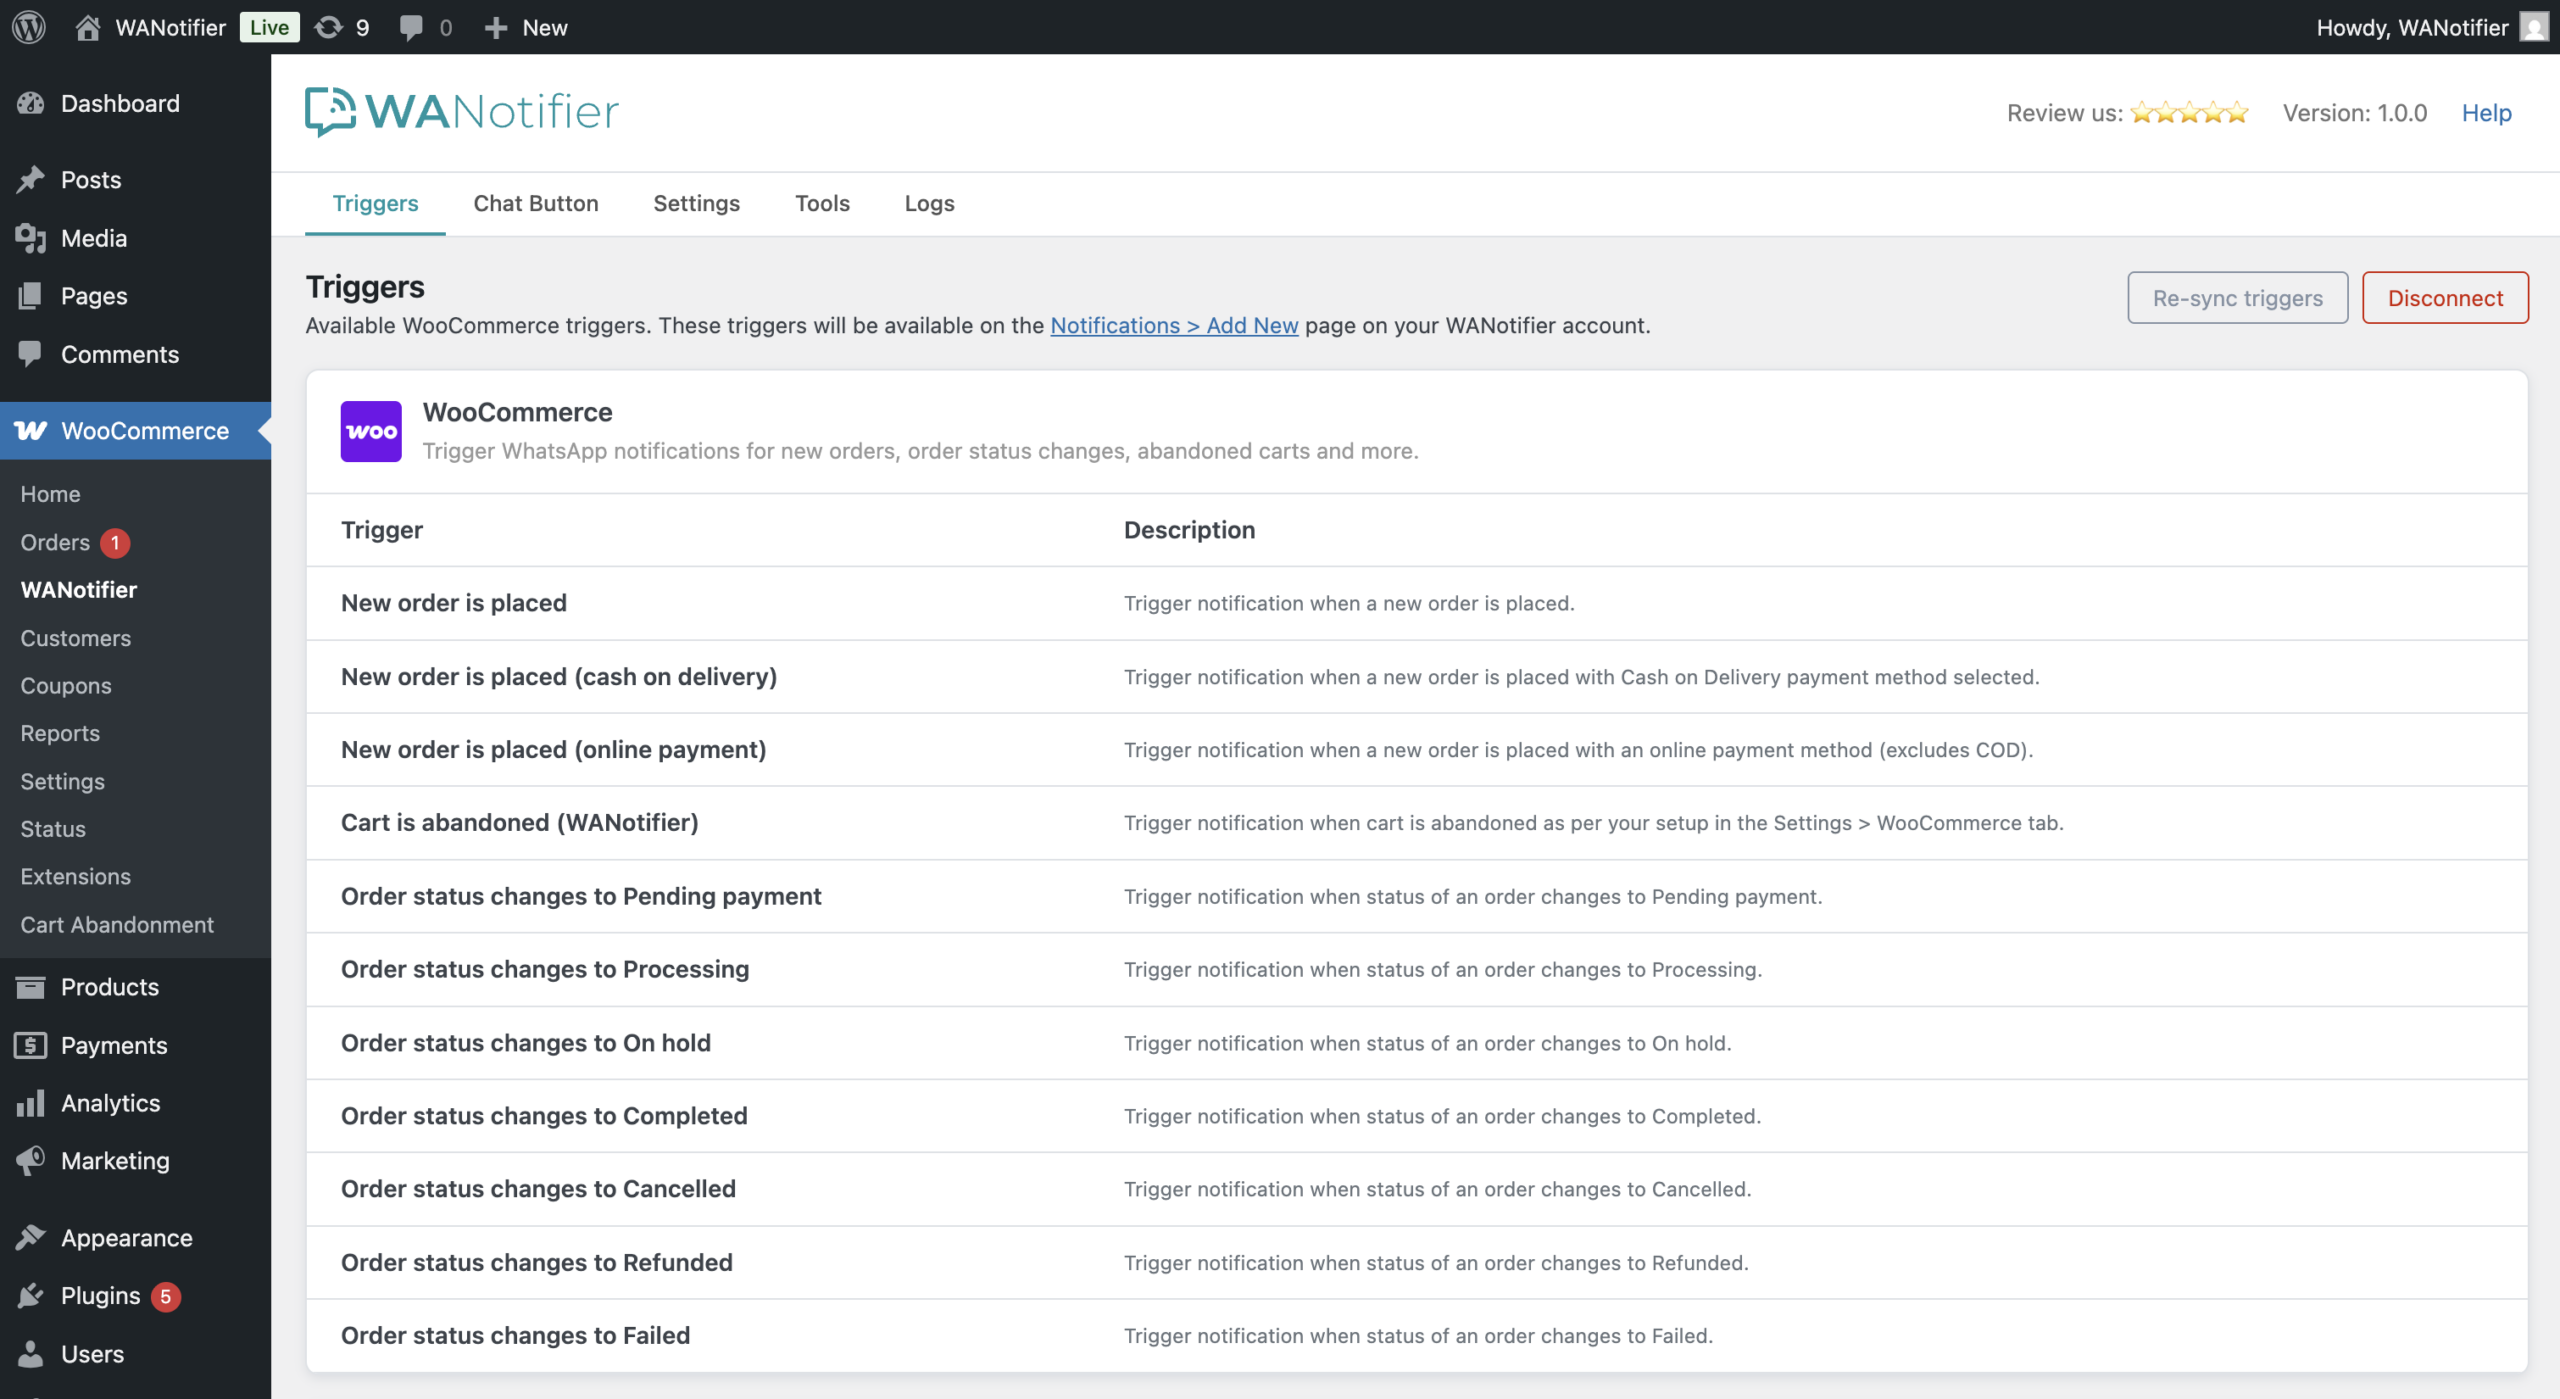
Step 3 – Connect the WooCommerce Plugin with WANotifier
After installing and activating the plugin, go to WooCommerce > WANotifier from the left sidebar menu. You’ll see a screen like this:
Click the Connect Your Existing Account button to link your WANotifier account to the plugin. If you still haven’t created an account, click the Create New Account button and follow the guide linked in Step #1.
If you haven’t created your account yet, you can click Create New Account instead.
Note that if you’re not logged into your account at this point, you’ll be redirected to the login screen. Otherwise, you’ll see a confirmation screen like this:
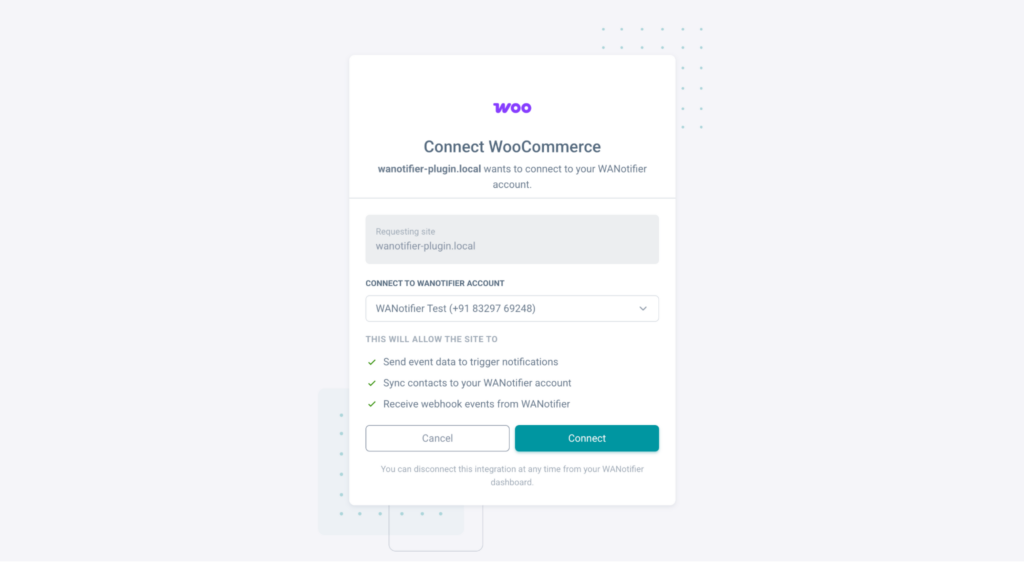
Click on the Connect button to complete linking your WANotifier account with the plugin.
Once you’ve done that, you’ll be redirected back to your website to this page:
Step 4 – Create Message Template on WANotifier
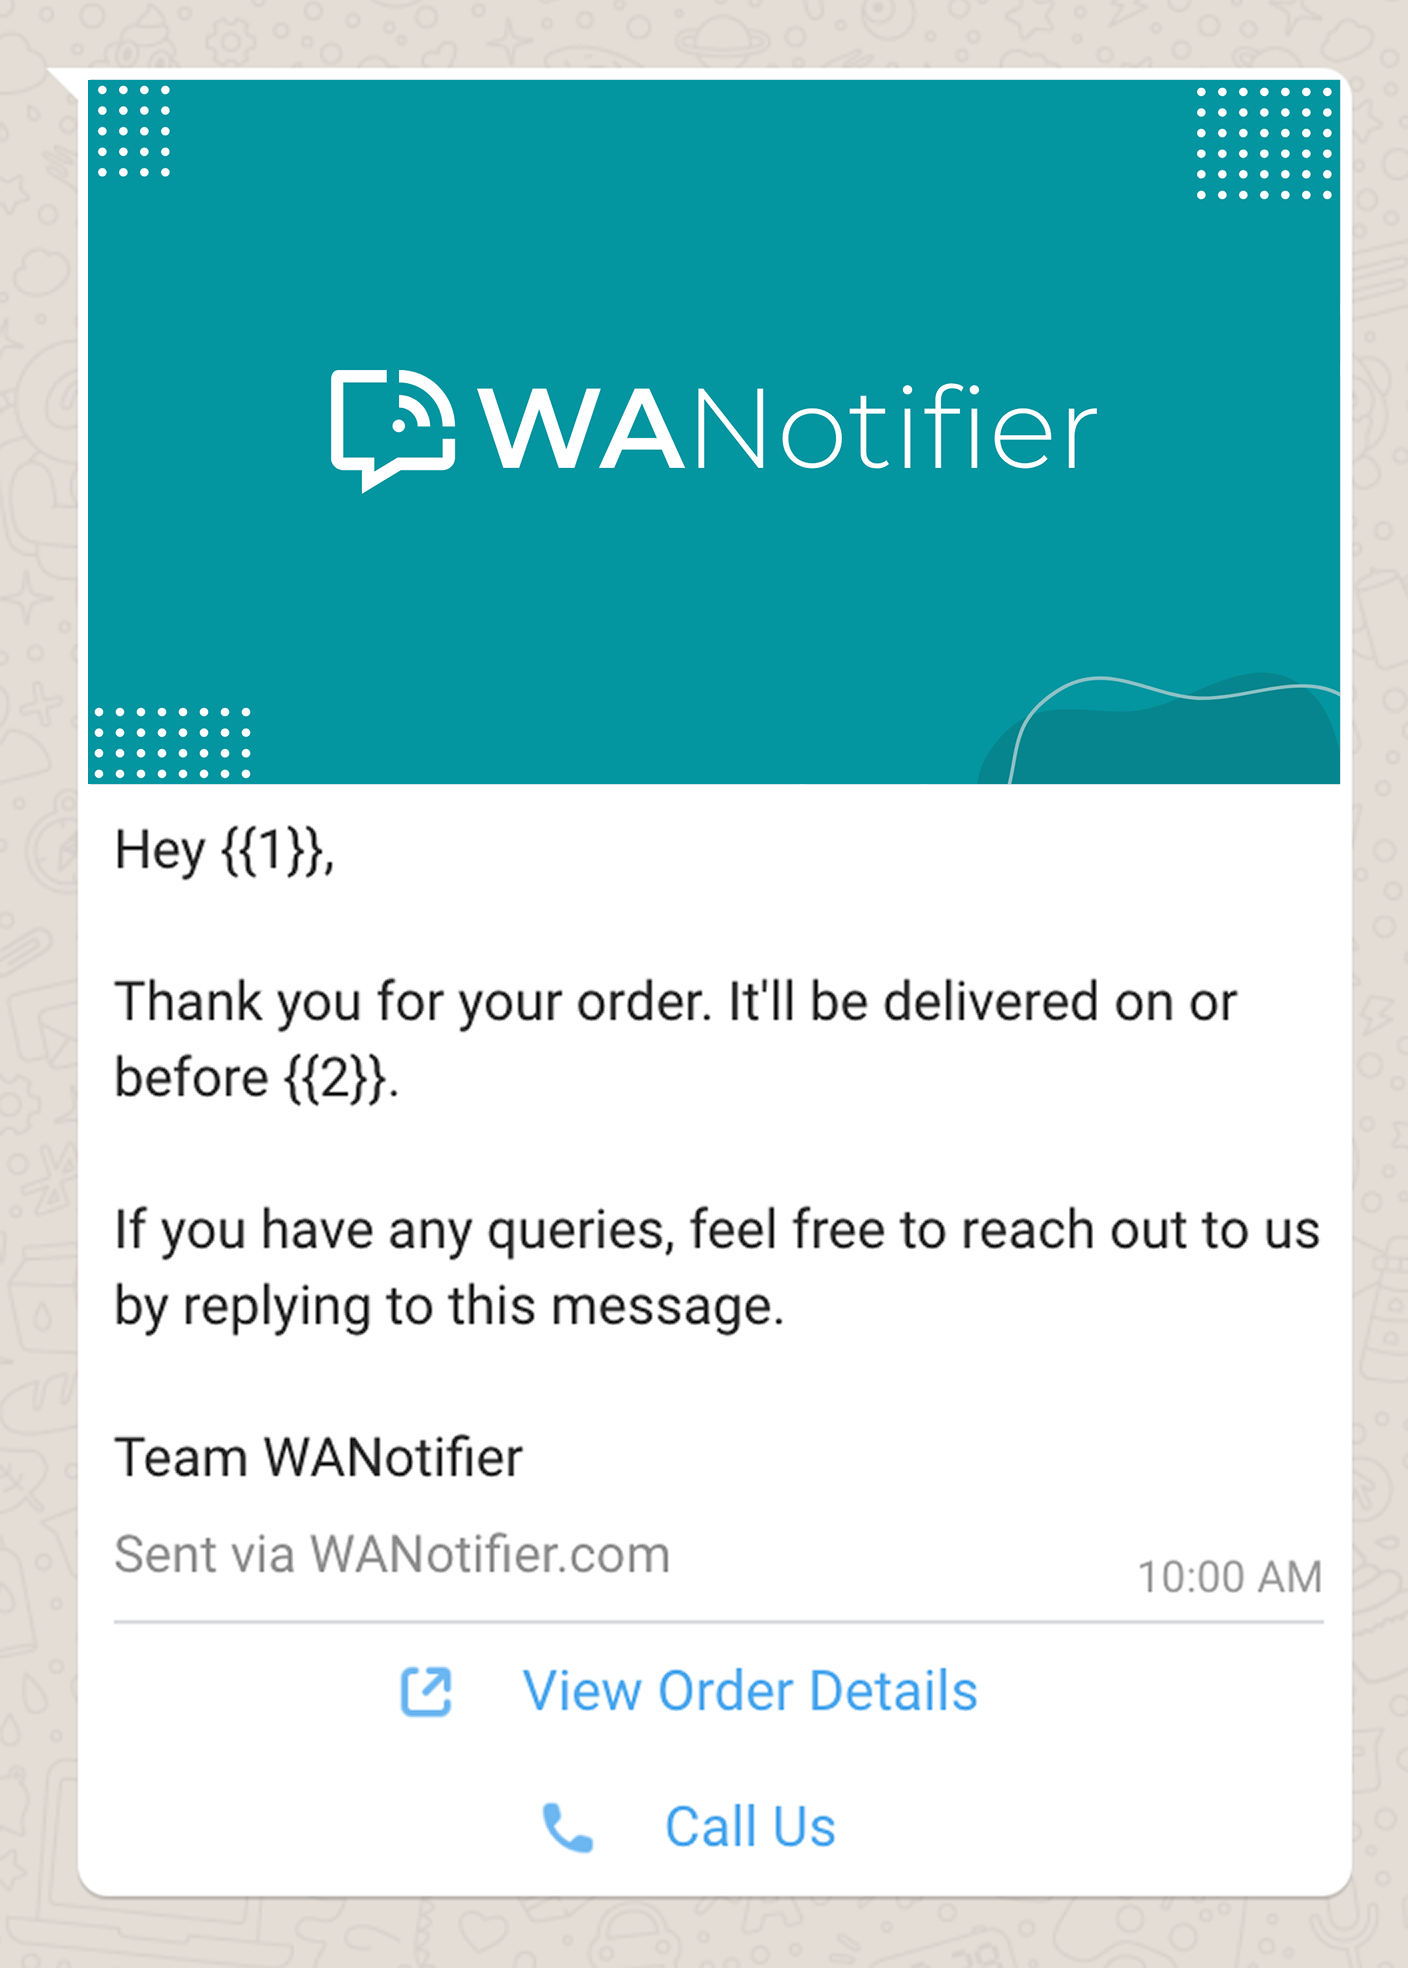
The next step is to create a Message Template in your WANotifier account.
You can think of message templates like email templates, except that with the WhatsApp API, templates must be created in advance and approved by WhatsApp before you can send them to customers.
Here’s how to create a message template:
- Go to your WANotifier account and click on the Content Library option in the left sidebar, then select Message Templates from the dropdown.
- Once you’re on the Message Templates dashboard, click on the Add New Message Template button in the top-right corner to create a new template that you want to send to your WooCommerce customers.
- You can create a template with static body text or with variables like {{1}}, {{2}} and so on.
- You can map these variables to actual data fields when creating a notification, as shown in the next step.
- You can also add text, an image, a PDF, or a video to the template header, add footer text, and include buttons in the template footer.
- After creating the template, you have to submit it to WhatsApp for review.
Note that it can take anywhere from a few minutes up to 24 hours for WhatsApp to review your template.
Once that is done, you can use the template to send notifications to your customers, as shown in the next and final step.
Step 5 – Create a Notification
Finally, let’s create a Notification. This will tell the system which message to send when a particular event gets triggered on your WooCommerce store.
Here’s how to set up a notification:
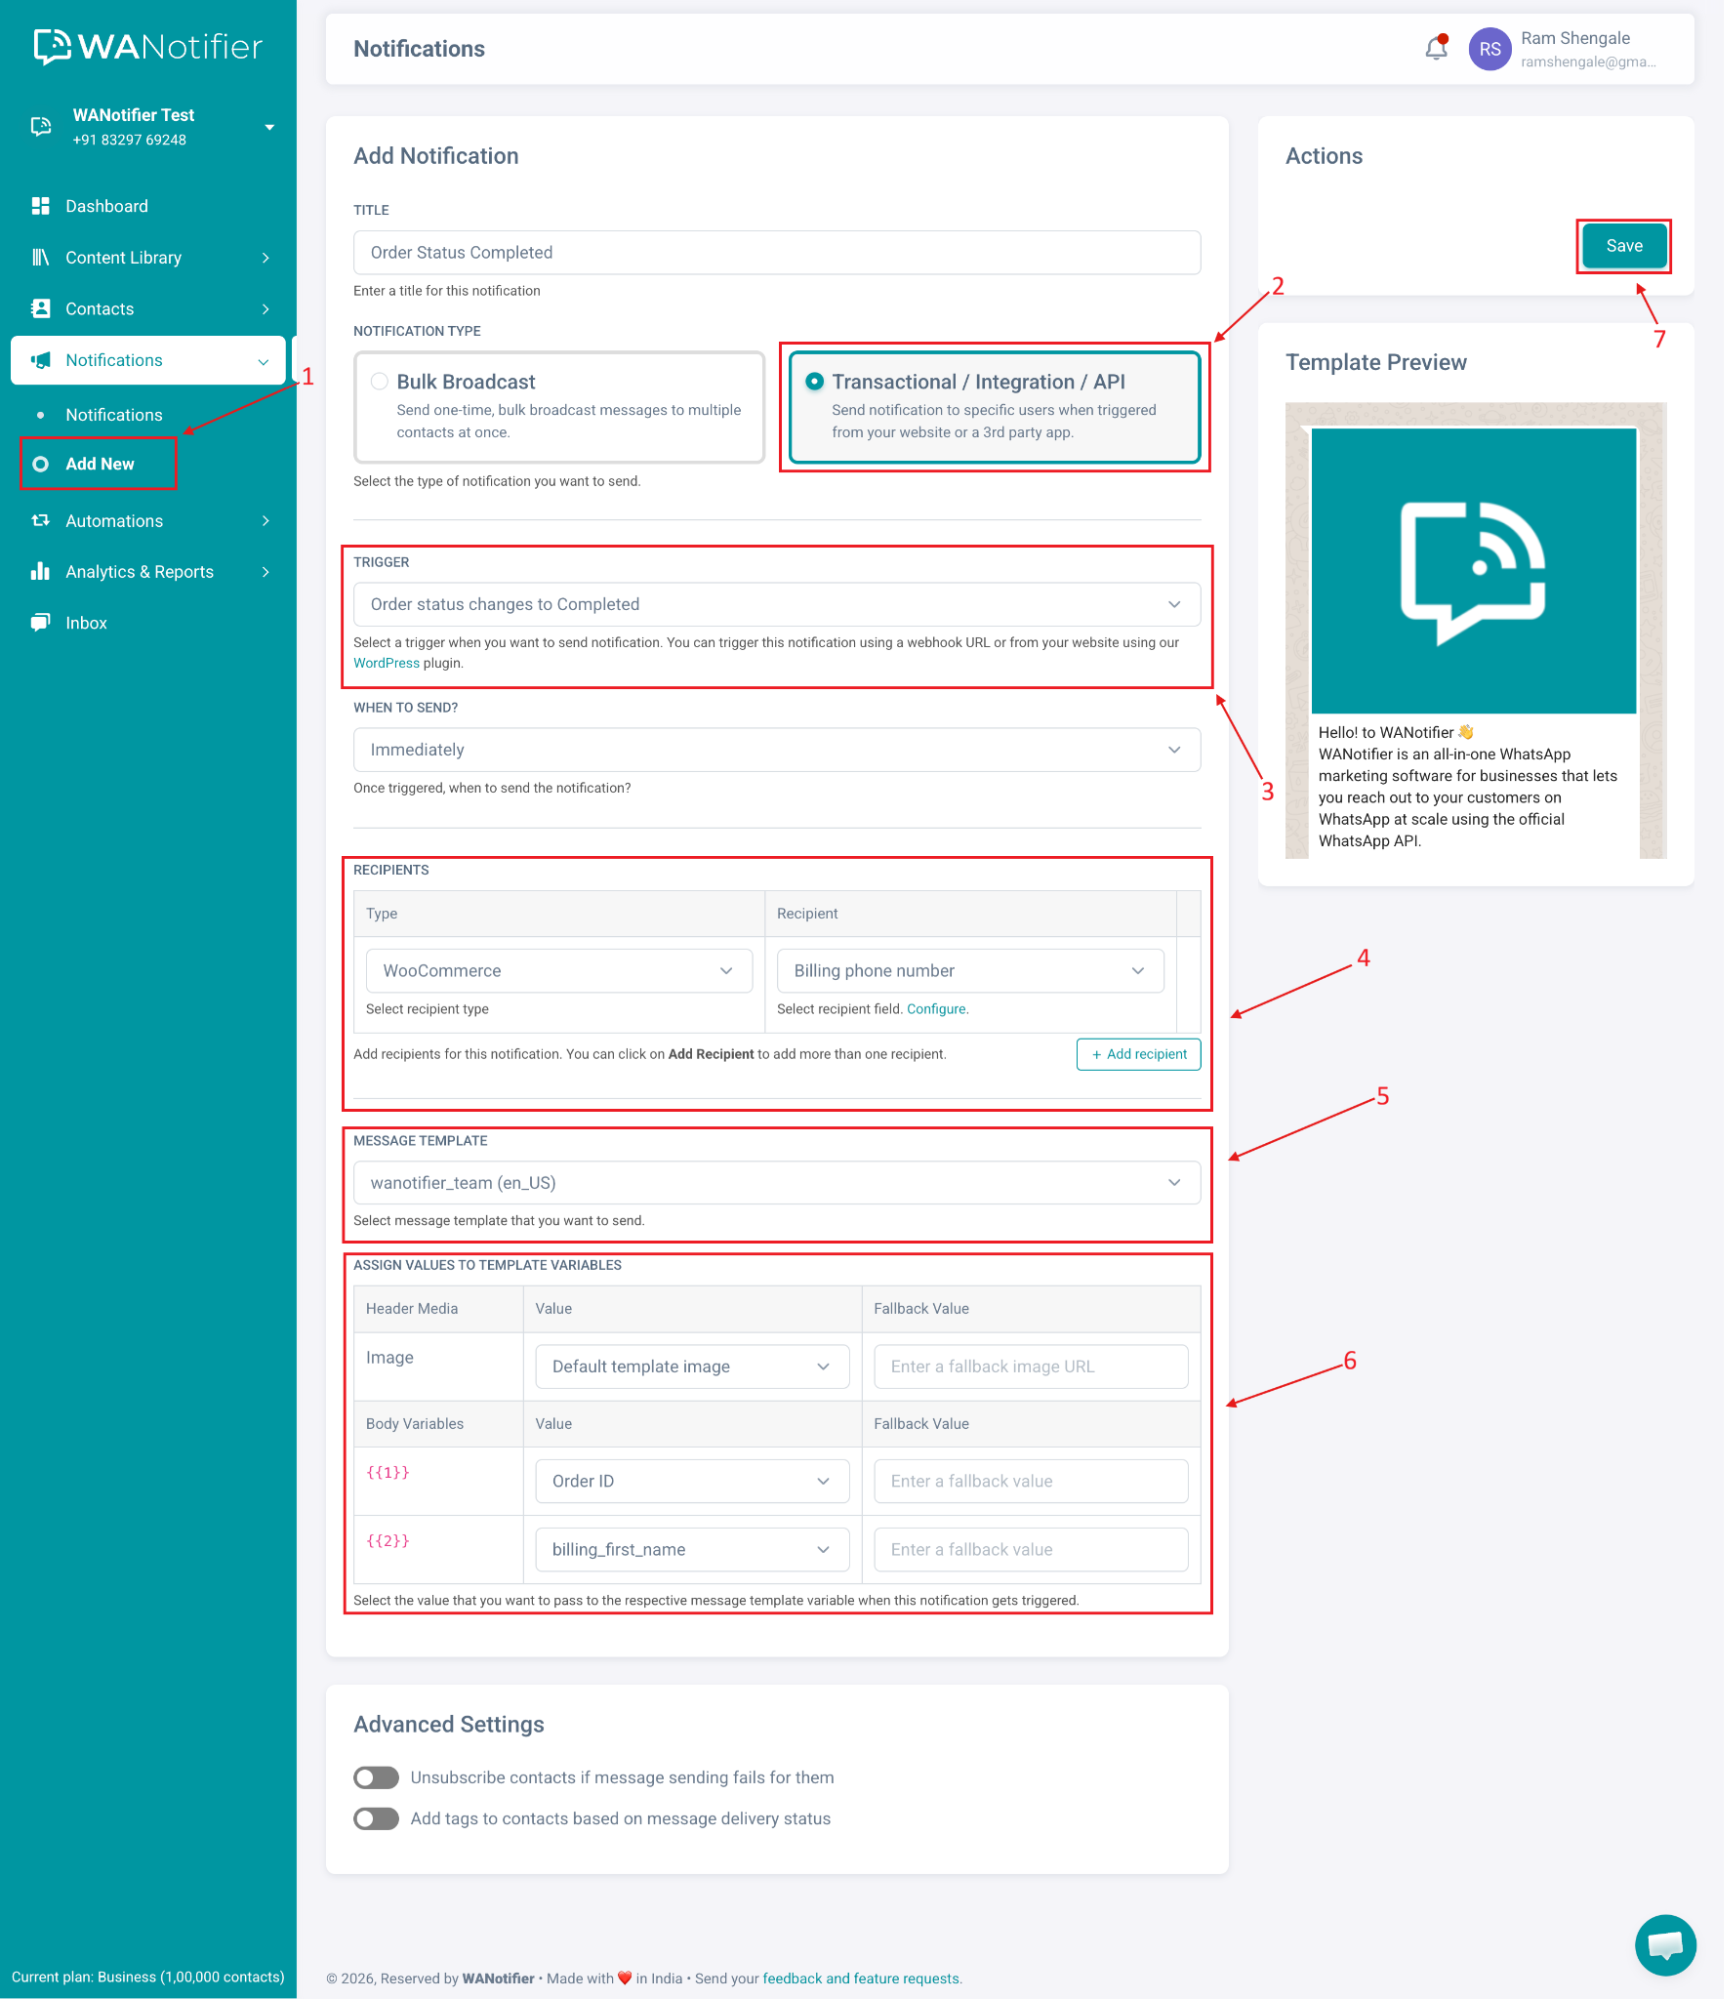
- In your WANotifier account, click Notifications in the left sidebar, then select Add New from the dropdown.
- Select Notification type as Transactional/ Integration/ API.
- In the Trigger dropdown, choose one of the triggers under WooCommerce for which you want to send a notification. For example, Order status changes to Completed.
- In the Recipients section, select WooCommerce as the recipient type. Then, select the Customer billing phone number as the recipient. You also have the option to automatically add the recipient’s phone number to your contact list and apply tags for audience segmentation by clicking the Configure option here.
- Now select the Message Template you created in step #4
- If your message template contains variables, map them to the available Data fields. You can also add a Fallback value in case the Value field might come empty.
- After this is done, click on the Save button to save this notification.
That’s it, your setup is complete! From now on, WhatsApp notifications will be automatically sent to your customers whenever the selected WooCommerce event occurs on your WordPress website.
Conclusion
Sending WooCommerce order notifications on WhatsApp is easier than it might seem.
With access to the WhatsApp Business API and a platform like WANotifier, you can automate order confirmations, shipping updates, abandoned cart reminders, and more, within minutes, without any technical headaches.
Also, since WANotifier charges 0% markup on WhatsApp API usage costs, you can scale your notifications confidently, without hidden costs eating into your margins.
👉 Download the WANotifier WooCommerce plugin today to boost customer experience and drive repeat purchases.
Install WANotifier's Order Notifications for WooCommerce Plugin
Or click here to download the plugin and install it manually!
Frequently Asked Questions (FAQs)
Do I need the WhatsApp Business API to integrate WooCommerce with WhatsApp?
Yes. Neither the personal WhatsApp app nor the WhatsApp Business app supports direct integration with WooCommerce.
To send automated order notifications, abandoned cart reminders, or any other messages at scale from WooCommerce, you must have access to the WhatsApp Business API.
What types of WooCommerce WhatsApp notifications can I send?
With WANotifier, you can send WhatsApp notifications based on a wide range of WooCommerce triggers, including:
- New order is placed
- Order status changes to Processing
- Order status changes to Completed
- Order status changes to Refunded
- Order status changes to Awaiting Dispatch
- Cart is abandoned
…and more.
Can I send abandoned cart reminders from WooCommerce on WhatsApp?
Yes. By integrating WooCommerce with WhatsApp and using a platform like WANotifier, you can automatically send abandoned cart reminders from your store.
Do I need coding knowledge to integrate WooCommerce with WhatsApp?
No. With WANotifier’s WooCommerce integration plugin, you don’t need any coding experience to connect WhatsApp to your store. Our tool comes with pre-configured triggers for key store events and an easy-to-use dashboard where you can create message templates and configure notifications — all without writing a single line of code.
How much does it cost to integrate WooCommerce with WhatsApp?
There is no cost at all to integrate your WooCommerce store with WhatsApp using WANotifier.
However, messages sent through the WhatsApp Business API are chargeable. Meta applies an official per-message charge, and the cost depends on the type of message you send (marketing, utility, or authentication) and the recipient’s location.
Note that with WANotifier, you pay Meta’s standard API rates without any additional markup, unlike other platforms that charge 12% to 25% markup on messaging costs.