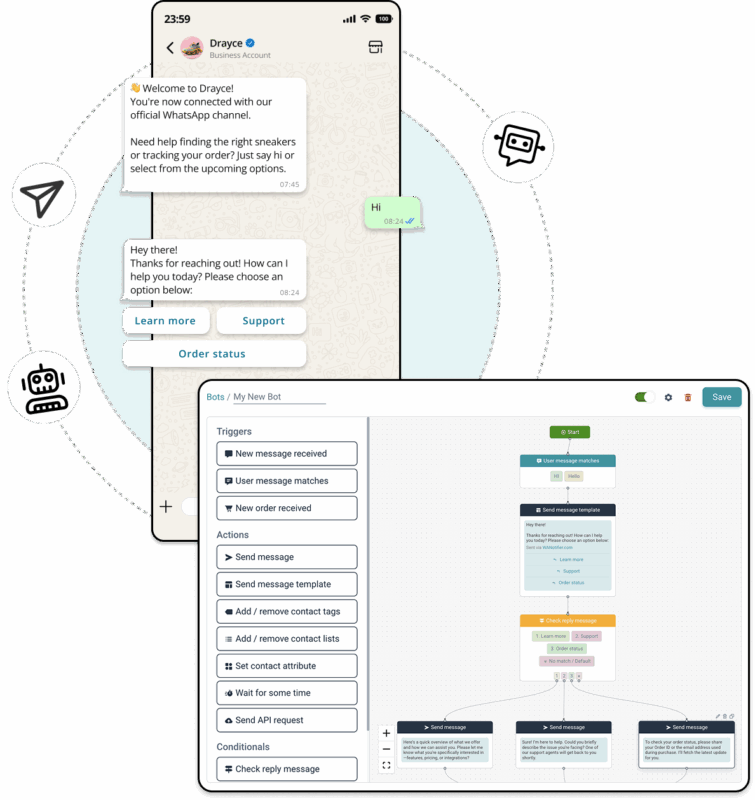
How to Build a WhatsApp Chatbot? (2024)

Most of your customers are on WhatsApp and you know how important it is to engage with them effectively on the platform. You may have thought about hiring a sales or customer support team to take care of the inbound chats, but scaling that can be very costly.

That’s where WhatsApp chatbots can come to your rescue.

WhatsApp chatbots can not only help you improve your customer interactions but also increase the speed and engagement without human intervention. Let’s start by first understanding what a WhatsApp chatbot is.

What is WhatsApp Chatbot?

A Whatsapp chatbot is an automated tool or system that allows you to receive customer queries or actions on WhatsApp and automatically respond to them or perform some custom pre-defined action. Chatbots do not require human intervention and can work round the clock, providing 24/7 automated customer interactions.

WhatsApp chatbots can also be integration with AI systems to provide full-fledged automated chat flow. These chatbots require WhatsApp API to work and can not be setup using your standard WhatsApp or WhatsApp Business mobile apps.

Why Build a WhatsApp Chatbot?

There are many benefits of building a WhatsApp chatbot. Some of the include:

  1. Enhanced Customer Service: A WhatsApp chatbot ensures your customers receive immediate assistance any time of the day, streamlining support and enhancing user satisfaction.
  2. Increased Sales and Engagement: Chatbots facilitate a smoother buying journey and personalized engagement, helping boost conversions and customer loyalty. If you run an eCommerce store, this means there’s a smooth flow for your customers to buy your products and services.
  3. Operational Efficiency: By automating routine tasks and responses, chatbots free up your team to focus on more strategic initiatives, optimizing resource allocation.
  4. Global Reach and Accessibility: With WhatsApp’s widespread adoption, chatbots enable you to connect with a global audience, providing support across different time zones without pause, ensuring your business is accessible 24/7.
  5. Cost Reduction: Implementing a chatbot can significantly reduce operational costs by minimizing the need for a large customer service or sales team, especially during off-hours or for handling common inquiries.

These are just a few of the myriad of benefits of building a WhatsApp chatbot. Now that we know the benefits of building a chatbot, let’s look at how you can build one using WANotifier.

3 Easy Steps to Build WhatsApp Chatbot

WANotifier simplifies the process of WhatsApp chatbot creation, allowing businesses to build sophisticated, interactive chatbots without needing in-depth technical knowledge. Our tool’s user-friendly interface and robust features make it an ideal choice for businesses looking to leverage WhatsApp chatbots effectively.

Here’s how you can get started:

Step 1 – Create your WANotifier account and setup WhatsApp API

The first step is to create your free account with WANotifier and connect your phone number with WhatsApp API.

As mentioned earlier building chatbots is not possible using the free WhatsApp and WhatsApp Business apps so you need to use the WhatsApp API offering provided by Meta.

You can either use this API by building a custom system that requires you to know how to code. Or you can use one of the pre-build tools like WANotifier to use the API. In this article we’re seeing how you can use the WhatsApp API with no coding knowledge.

To help you with the setup, you can refer to your detailed article on how to setup your WANotifier account.

After your WANotifier account is ready with WhatsApp API setup, you’ll be redirected to your dashboard. Once you’re there, you are ready to move to the next step.

WANotifier Dashboard

Step 2 – Build Your Bot

From the Dashboard sidebar go to Automations > Bots page and then create on Add New button to start creating a new bot. You will land up on a page similar to the following:

On this page you will find an intuitive, easy to use drag-and-drop bot builder that you can use to build complex WhatsApp chatbots with no coding knowledge required. Before we start building a bot, let’s understand a few basic components of the bot builder:

1. Nodes

These are the building blocks of your bot’s logic, representing different actions or decisions your bot can make. In our chatbot builder there are 4 different categories of nodes:

  1. Start and End Nodes – Your flow should have a clear starting point and an endpoint to define the conversation’s beginning and closure. For these you need to use the Start and the End nodes. A bot must always start with a Start node and end with an End node.
  2. Trigger Nodes: These nodes wait for user input and triggers your chatbot if certain condition is met. For example the New message received trigger node would trigger the chatbot when someone messages you for the very first time. Similarly User message matches node would trigger the chat when user message matches one of the configured trigger words/phrases.
  3. Action Nodes: These nodes perform specific actions like sending messages or message templates, updating contact information like tags, lists or attributes, adding a delay or sending custom API request to your API urls.
  4. Conditional Nodes: These nodes help you to direct the flow of your chatbot based on certain conditions or user inputs. For example you can wait to check the user’s response and then direct the bot to one or the other action nodes.

2. Edges

These are the connecting lines that you use to connect various nodes. They’re used to illustrate the path your bot should take based on certain conditions or actions.

3. Handles

These are the points where edges connect to nodes, determining the flow’s direction.

To understand these components further in detail, you can refer to the image below.

Now that you understand the different components of bot builder, let’s build your first bot.

Putting it all together

  1. Begin by adding a Trigger node to the Start node. This trigger node will be responsible for starting the chatbot.
  2. Progressively add other Action and Conditional nodes, connecting them with edges to define your bot’s behavior.
  3. Customize each node by clicking on the edit icon according to your needs, specifying messages, conditions, or API endpoints.
  4. Add an End node at the bottom and connect all the open handles to this node.

Once you’re done, save the bot, enable it using the toggle and then save it again. Your bot is now live.

Step 3 – Test Your Bot

After saving your bot, test the bot flow thoroughly to ensure it behaves as expected, making adjustments as necessary. Try triggering the chatbot from various WhatsApp numbers and with different combination of messages to check if the flow happens properly for each condition.

Once tested, your bot will be ready for prime time!

Wrapping up

WhatsApp chatbots represent a dynamic and powerful tool for businesses, offering a new level of interaction and service. With WANotifier, creating a sophisticated chatbot is accessible and straightforward, allowing businesses to harness the full potential of automated customer interactions.

By following these steps, you can develop a WhatsApp chatbot that not only meets your business need but also help you provide a delightful customer experience.

Get Started with WANotifier for Free Today!