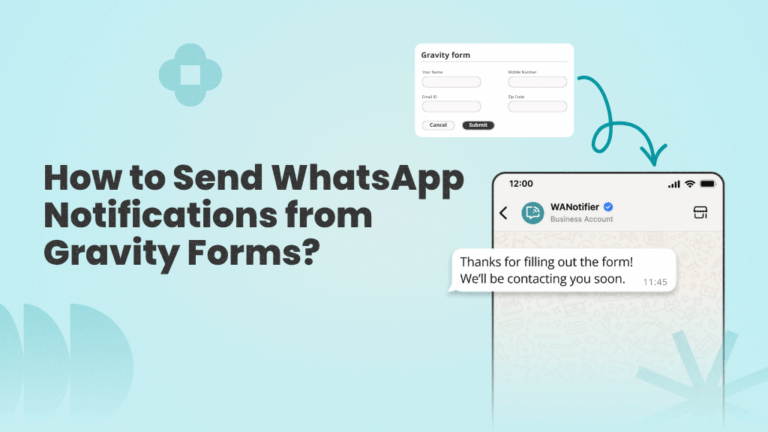
Want to send WhatsApp notifications whenever someone submits a Gravity form on your WordPress site?
In this article, I’ll show you exactly how to do this using the official WhatsApp Business API. But before we get into the steps, let’s quickly look at why this integration is worth setting up in the first place.
Install WANotifier's WhatsApp Integration Plugin
Or click here to download the plugin and install it manually!
Why Connect Gravity Forms with WhatsApp?
Once you connect Gravity Forms with WhatsApp, you’re able to respond to form submissions instantly and keep the conversation going without manual effort.
Here’s what that looks like in practice:
1. Instant Notifications for Every Form Submission
By connecting Gravity Forms with WhatsApp, you can trigger automated alerts for form submissions for your team members, so they’re instantly notified of new leads or inquiries. At the same time, you can send confirmation messages to users with a thank-you, next steps, or any other relevant information.
2. Instant Lead Engagement
Another big advantage of connecting WhatsApp with Gravity Forms is how quickly you can engage with leads.
The moment someone submits a form, you can follow up with a personalized message (based on their responses).
You can also:
- Set up drip campaigns to nurture them over time
- Or create WhatsApp chatbots and auto-replies to guide them through the next steps, whether that’s completing a purchase or exploring your services.
3. Centralized Communication on WhatsApp
Once a form is submitted, your team can handle all follow-up communication directly on WhatsApp, rather than switching between email threads or multiple tools. This way, it’s easier for them to stay on top of conversations, respond faster, and ensure no lead slips through the cracks.
Now that you know the benefits of integrating Gravity Forms with WhatsApp, let’s look at what you need to get started.
Requirements for Integrating Gravity Forms with WhatsApp
To connect Gravity Forms on your WordPress website with WhatsApp, you’ll need:
- Access to the WhatsApp Business API: This allows you to connect your Gravity Forms to WhatsApp and send automated notifications for form submissions at scale.
- A WhatsApp API platform, like WANotifier: The API itself doesn’t come with a dashboard or interface. To use it effectively, you need a third-party platform, such as WANotifier, that connects your forms to the API and provides ready-to-use tools for creating and sending notifications for Gravity Forms submissions.
Let’s take a closer look at these prerequisites, starting with the WhatsApp Business API.
Understanding the WhatsApp Business API
The WhatsApp Business API is a solution by Meta that enables businesses to send messages to their customers at scale.
Unlike the regular WhatsApp or WhatsApp Business app, which only support manual, one-on-one conversations, the API is built for high-volume messaging and advanced automation, and is ideal for businesses that want to:
- Send WhatsApp messages to thousands of contacts simultaneously
- Automate workflows and conversations using chatbots and auto-replies
- Integrate WhatsApp with websites, forms (like Gravity Forms), CRM, and other tools
…and much more.
If you’d like to learn more about the WhatsApp API, check out this detailed guide.
Why Use WANotifier for this Integration?
By now, you know that the WhatsApp Business API doesn’t come with a dashboard or interface you can use directly. To connect it with Gravity Forms and send messages, you need a third-party platform.
Now, there are quite a few options out there; however, most of them fall into one of these categories:
- Omnichannel solutions that bundle WhatsApp with email, SMS, social media, and other channels. These tools usually lack a dedicated WhatsApp plan, so you end up paying for features you’ll never use.
- Platforms that add a 12% to 25% markup on WhatsApp’s official messaging rates (which can quietly drive up your costs over time)
This is where WANotifier comes into play.
WANotifier is an official Meta Tech Partner and a dedicated WhatsApp marketing and automation platform that offers everything you need to manage end-to-end customer lifecycle marketing on the messaging app, including personalized marketing campaigns, an integrated CRM, auto-replies and chatbots, drip sequences, WhatsApp Flows, a shared team inbox, and advanced analytics.
On top of that, the platform applies 0% markup on WhatsApp API charges and offers a transparent pricing model that scales with your business.
You also get responsive customer support and hands-on onboarding assistance for setting up the WhatsApp API, plus a 7-day free trial to explore everything risk-free.
Now that you know why WANotifier is a good fit for sending real-time WhatsApp notifications from Gravity Forms, let’s look at how to set it up.
How to Send WhatsApp Notifications from Gravity Forms Using WANotifier?
Integrating Gravity Forms with WANotifier to send WhatsApp notifications is easy. Just follow the steps below to get started.
Step 1 – Create your WANotifier Account and Set Up Your Phone Number with the WhatsApp API
The first step is to create your free WANotifier account and connect your phone number to the WhatsApp Business API. You can follow the setup guide below to get started:
>> Create your WANotifier account and set up the WhatsApp API
Note that if you’re already using the WhatsApp Business App, you can upgrade your existing phone number to the WhatsApp API using the Coexistence feature. This will enable you to use both the app and the API simultaneously, without losing your chat history or contacts.
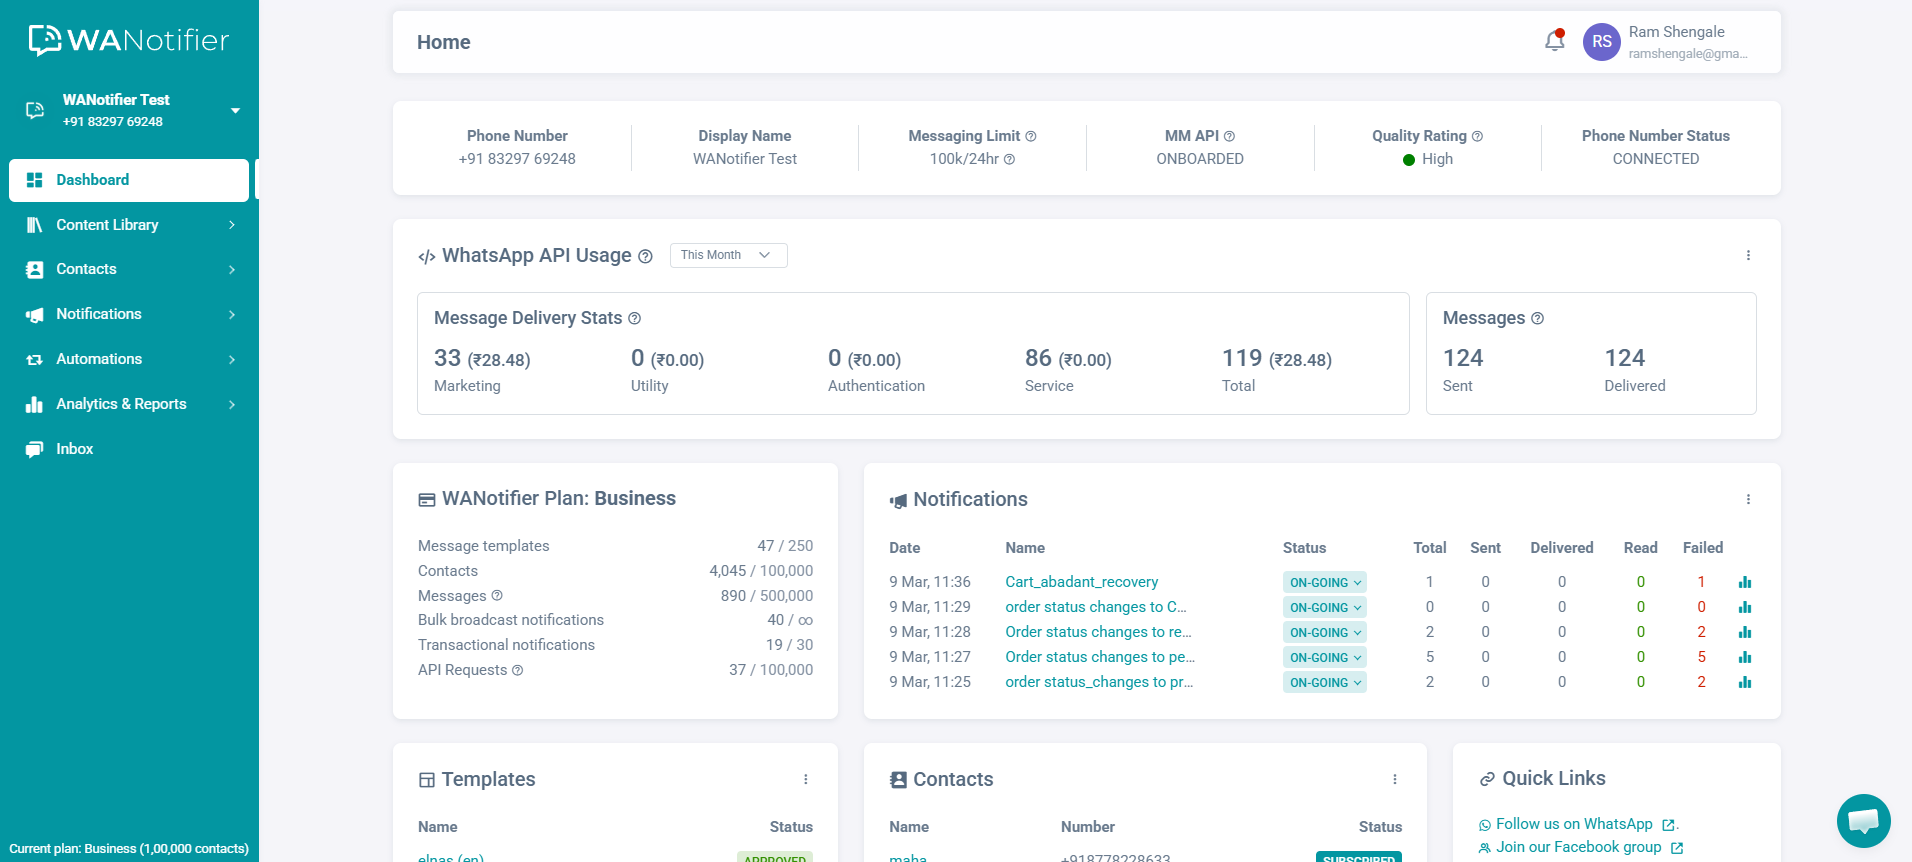
Once your account is set up and your number is connected successfully, you’ll be automatically redirected to your WANotifier dashboard.
Step 2 – Install and Activate WANotifier’s Integration Plugin
Next, download and install our WANotifier for Forms and Actions plugin on your WordPress website.
This plugin will enable you to connect your Gravity Forms to WANotifier and trigger automated WhatsApp notifications for form submissions.
Step 3 – Connect the Integration Plugin with WANotifier
Once you’ve installed and activated the plugin, go to WANotifier > Integrations from the left sidebar in your WordPress dashboard. You’ll see a screen like this:
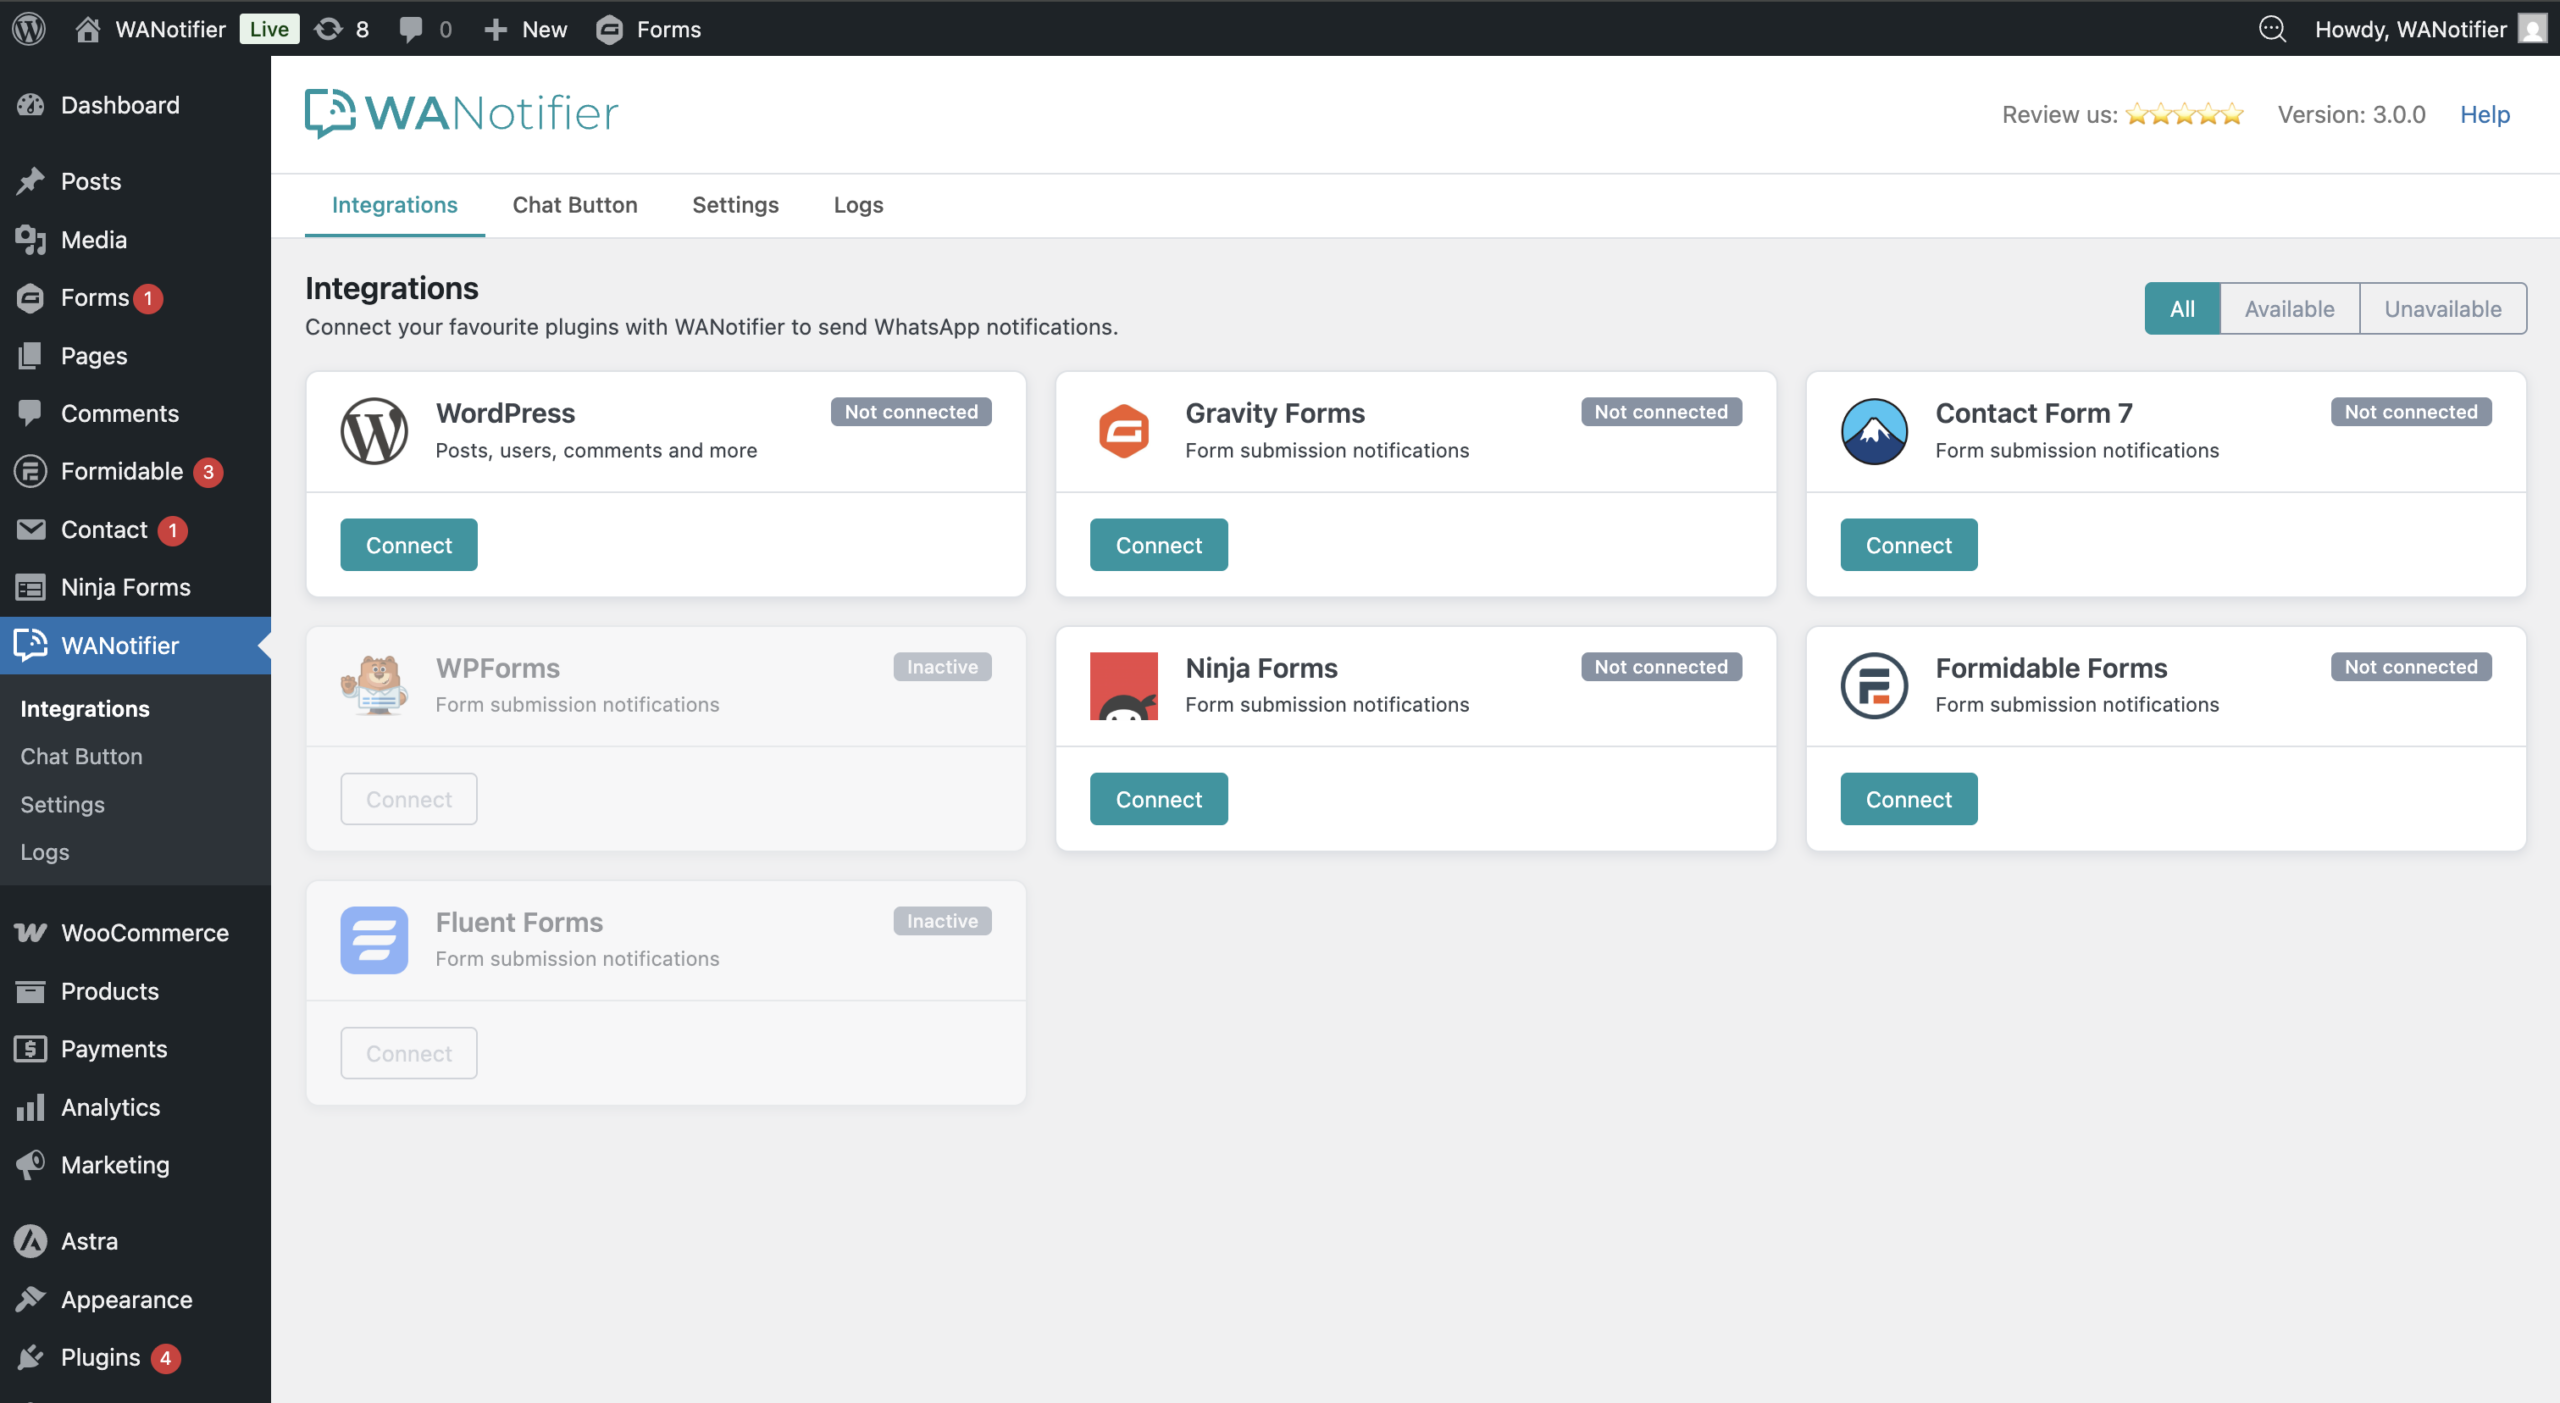
Click the Connect button in the Gravity Forms box on this page.
Note that at this point, if you’re not logged in to your WANotifier account, you’ll be redirected to the login screen. Otherwise, you’ll see a confirmation screen like this:

Click Connect here to link your WANotifier account to the plugin.
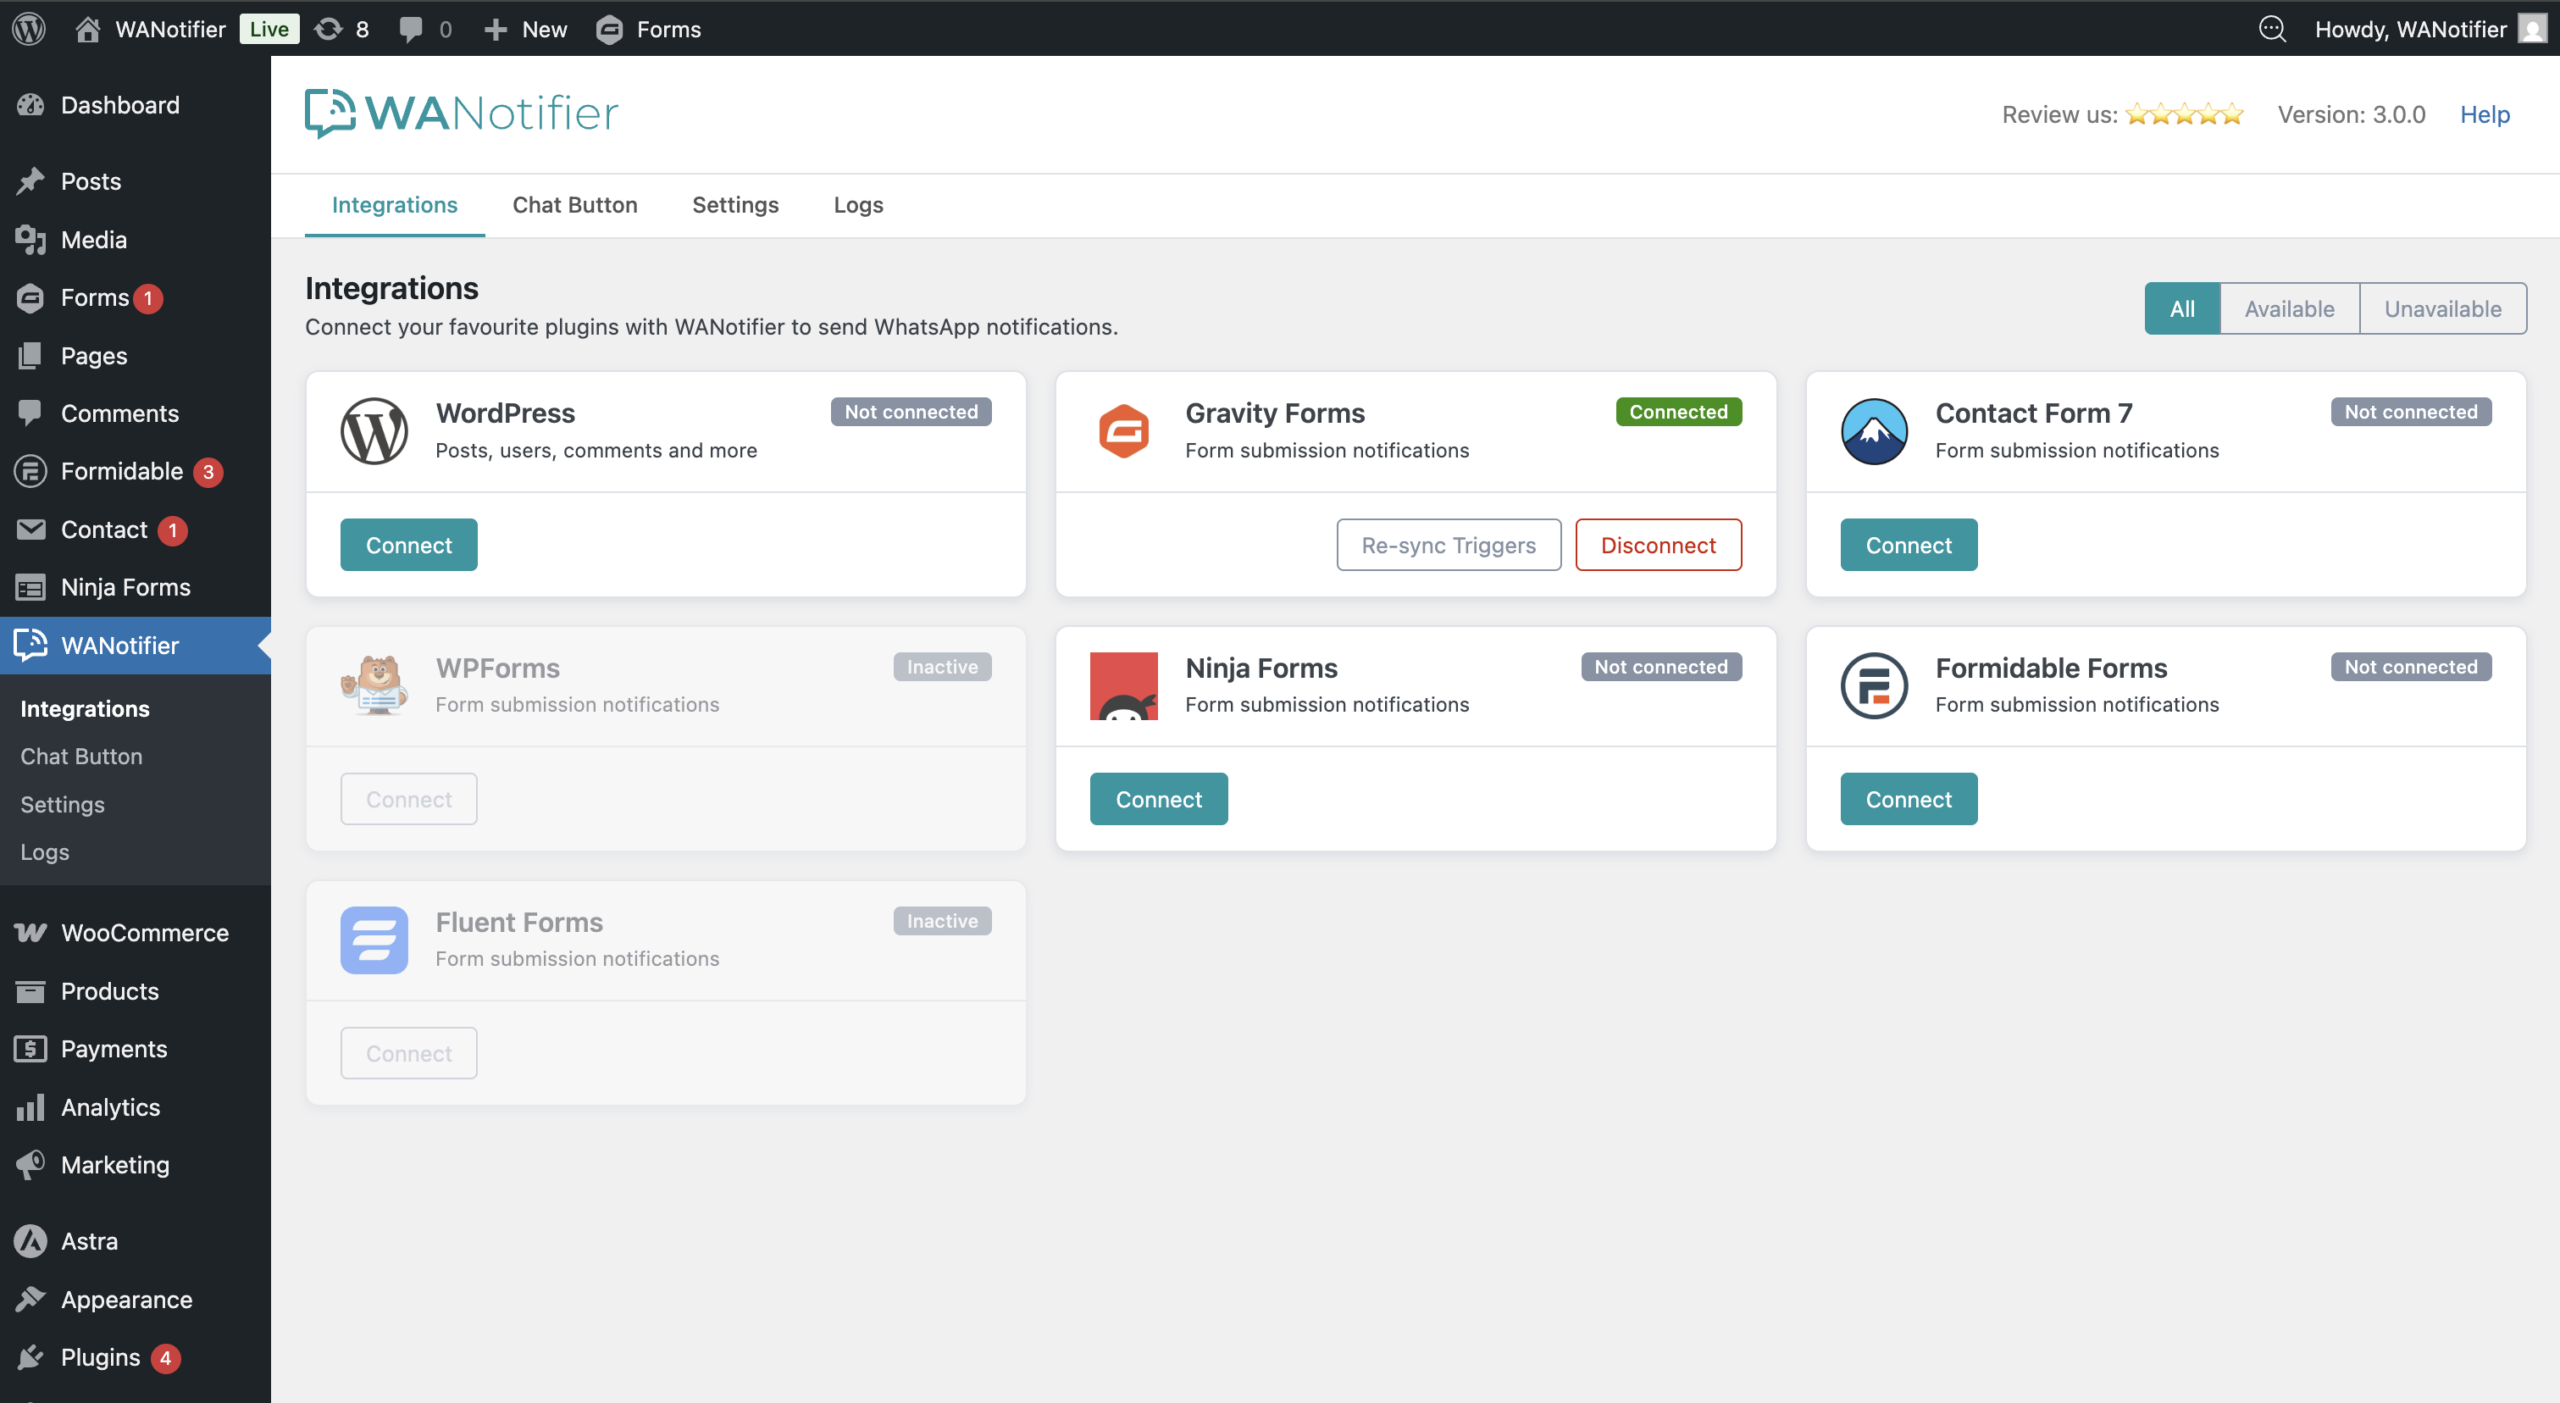
After that, you’ll be redirected back to the following page, where you’ll now see that Gravity Forms is successfully connected.
You’ll also find options to Disconnect the integration and Re-sync Triggers.
Step 4 – Create Message Template on WANotifier
Next, you’ll need to create a message template in your WANotifier account. This is the message that will be sent to users to confirm their form submission, or to your team to notify them of new entries.
Here’s how to create one:
- Go to your WANotifier account, click the Content Library option in the left sidebar, then select Message Templates from the dropdown.
- Once you’re on the Message Templates dashboard, click on the Add New Message Template button in the top-right corner to create a new template.
- You can create a template with static body text or with variables like {{1}}, {{2}}, and so on.
- You can map these variables to actual data fields when creating a notification, as shown in the next step.
- You can also add text, an image, a PDF, or a video to the template header, add footer text, and include buttons in the template footer.
- After creating the template, you have to submit it to WhatsApp for review.
Note that it usually takes a few minutes to up to 24 hours for WhatsApp to review your template.
After it’s approved, you can use the template to send notifications to users, as shown in the next step.
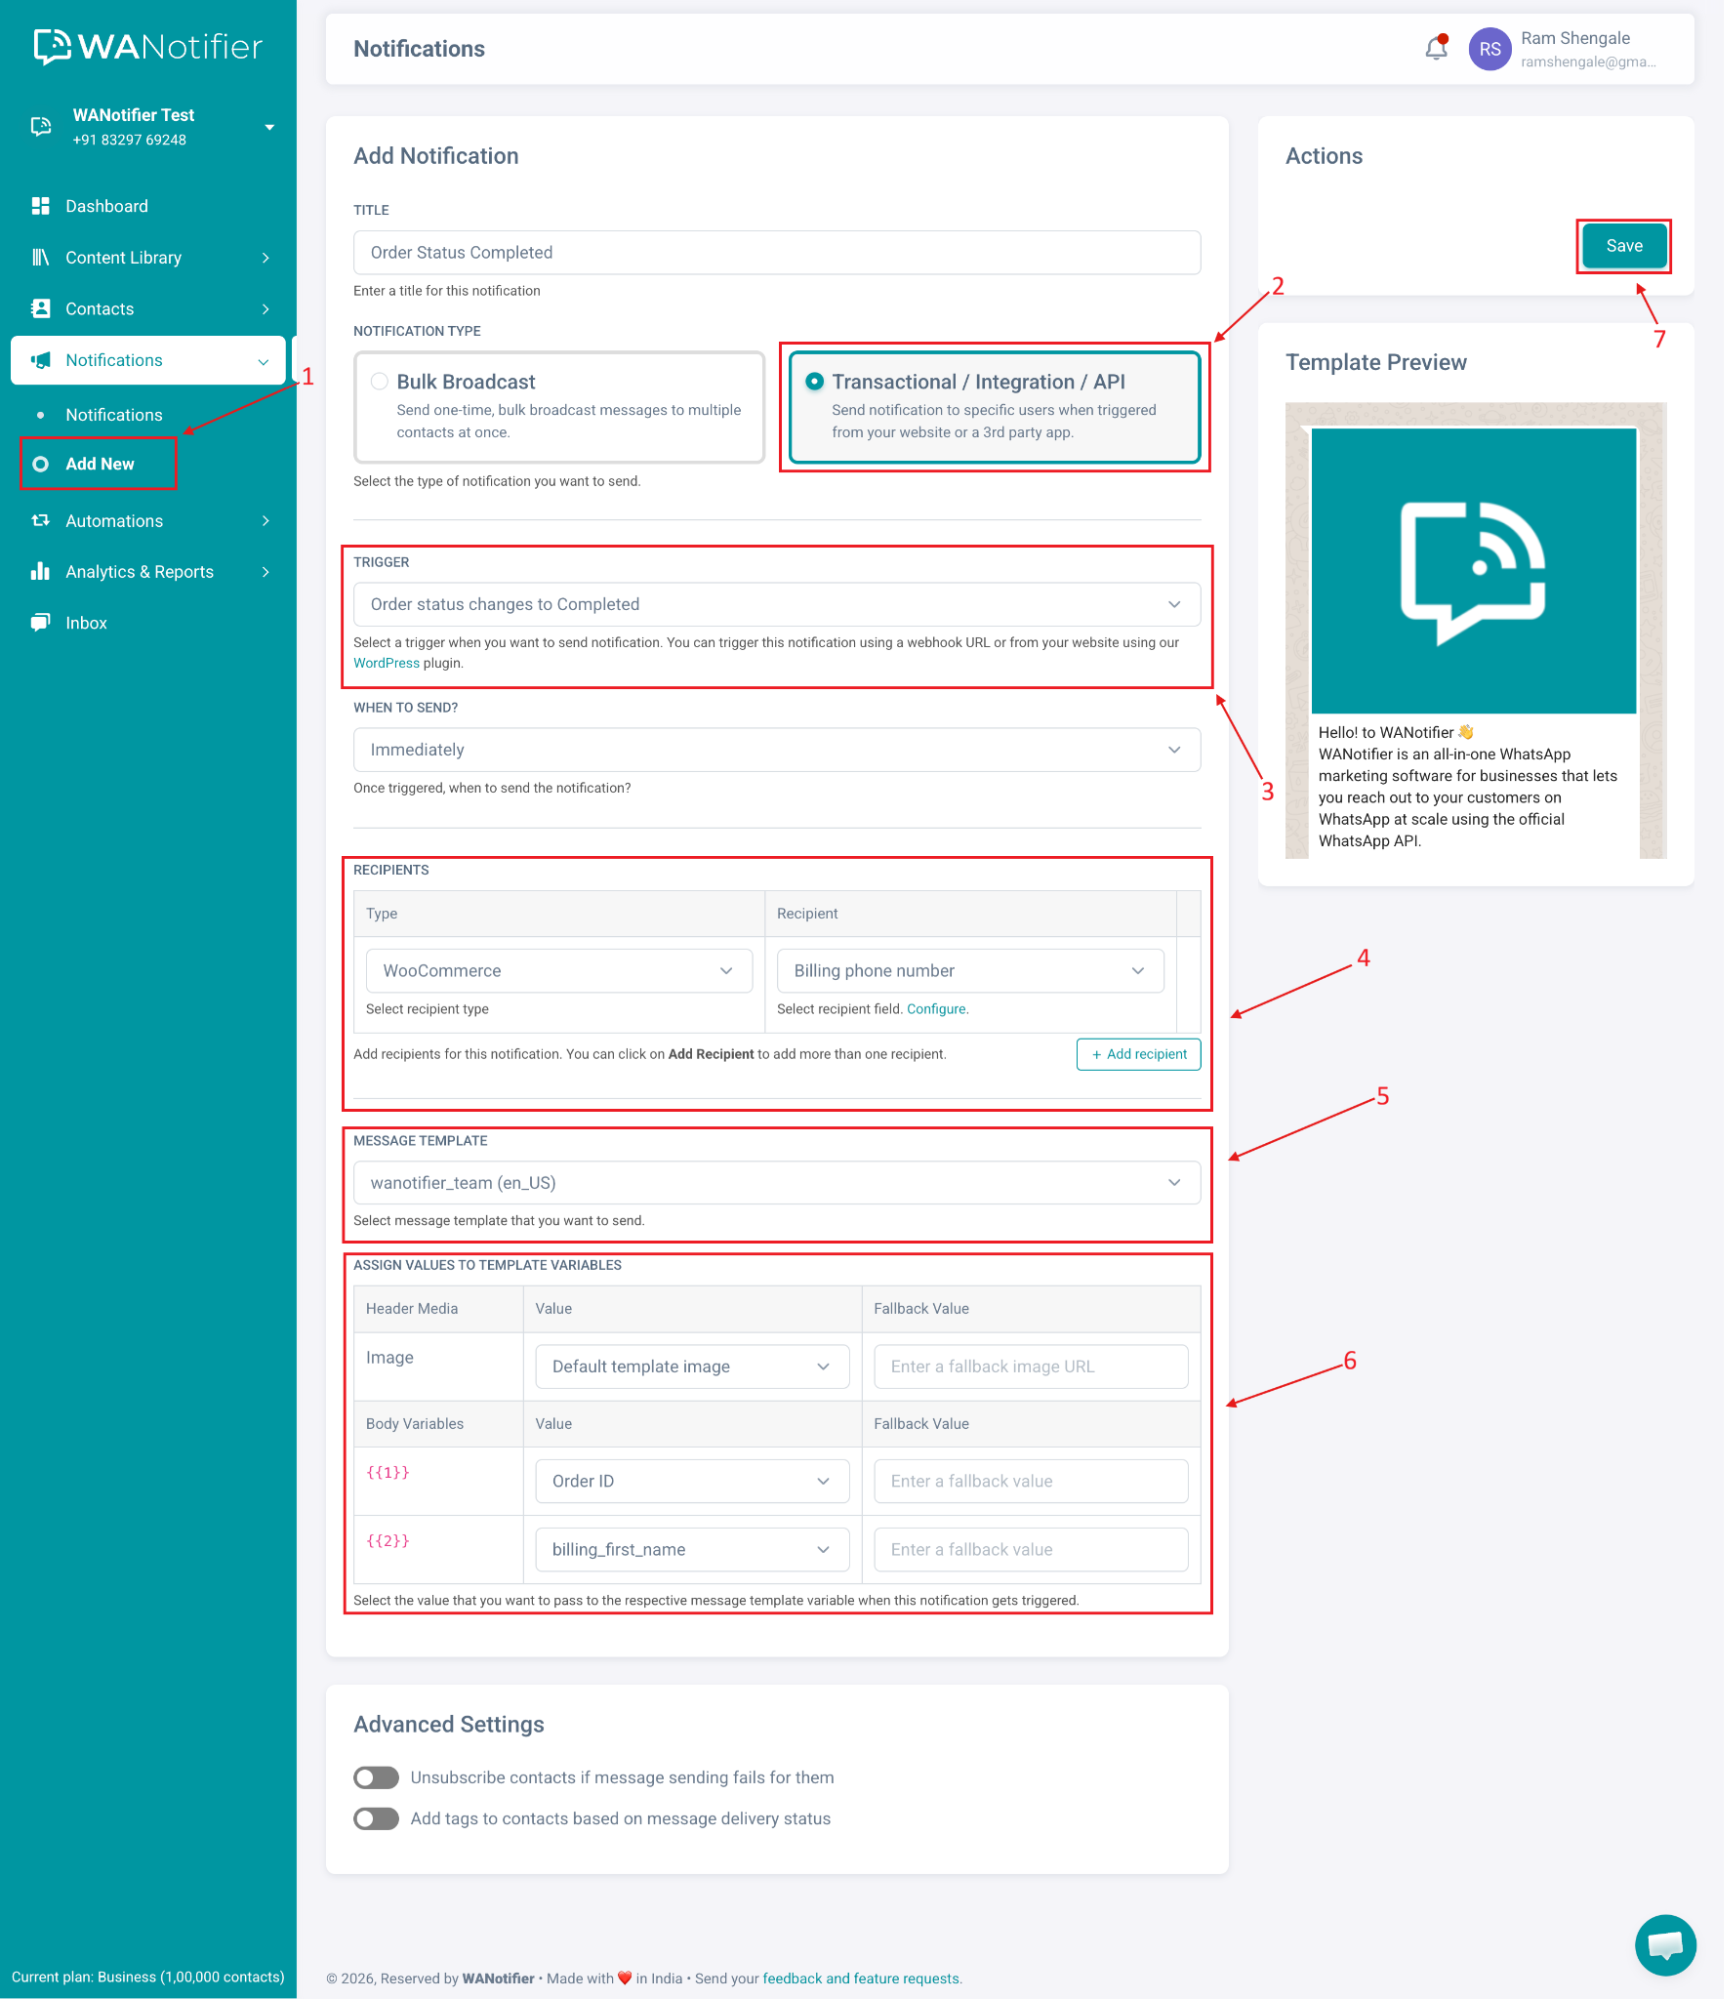
Step 5 – Create a Notification
Finally, let’s create a Notification to tell the system which message to send when a Gravity Form is submitted.
Here’s how to set up a notification:
- In your WANotifier account, click Notifications in the left sidebar, then select Add New from the dropdown.
- Select Notification type as Transactional/ Integration/ API.
- In the Trigger dropdown, choose your form’s trigger under Gravity Forms.
- In the Recipients section, select Gravity Forms as the recipient type, and then choose a phone number field as the recipient.
- You can also choose a specific Contact or Contact List here.
- Additionally, you have the option to automatically add the recipient’s phone number to your contact list by clicking on the Configure option.
- Now select the Message Template you created in step #4
- If your message template contains variables, you can map them to the available Data fields. You can also add a Fallback value in case the Value field might come empty.
- After this is done, click on the Save button to save this notification.
That’s it! Now, based on your setup, WhatsApp notifications will be automatically sent to users (or your team) whenever a Gravity Form is submitted.
Conclusion
Sending WhatsApp notifications and alerts for Gravity Form submissions is a lot simpler than it sounds.
With the WhatsApp Business API and a platform like WANotifier, you can instantly notify users, follow up with leads, and keep conversations going, without manually tracking submissions or sending messages one by one.
You can also use your form data to trigger personalized campaigns, automate follow-ups, or even build chatbots and drip sequences that guide users through the next steps.
Additionally, with 0% markup on WhatsApp API usage costs, you can scale your messaging without worrying about hidden costs eating into your margins.
👉 Download our integration plugin today and start sending real-time WhatsApp notifications for your Gravity Forms in just a few steps.
Install WANotifier's WhatsApp Integration Plugin
Or click here to download the plugin and install it manually!
Frequently Asked Questions (FAQs)
Is it possible to integrate Gravity Forms with WhatsApp without the API?
No, you need access to the WhatsApp Business API to send automated WhatsApp messages from Gravity Forms. Neither the regular WhatsApp app nor the WhatsApp Business app supports integrations with third-party applications, such as your WordPress website or Gravity Forms.
Can I send WhatsApp messages automatically after form submission?
Yes, once you’ve integrated your Gravity Forms with WhatsApp using WANotifier, you can automatically send WhatsApp messages whenever a form is submitted. These can be confirmation messages for users, internal alerts for your team members, or follow-up messages based on form responses.
Can I use WANotifier’s integration for multi-step and conditional Gravity Forms?
Yes, the integration works with single-step, multi-step, and conditional forms. Note that the trigger is based on the final form submission, not the form structure, and is fired only when the user submits the form.
What is the cost of sending WhatsApp notifications from Gravity Forms?
The cost of sending notifications for Gravity Forms comes down to two components:
- WhatsApp’s messaging charges: WhatsApp charges a per-message fee based on the message type (marketing, utility, or authentication) and the recipient’s location.
- Cost of the platform you use: Most platforms that offer access to the API and pre-built tools to leverage its features charge a monthly or annual subscription fee. Many of these platforms also apply a 12% to 25% markup on WhatsApp’s API messaging rates. Because of this, it’s important to opt for a platform, like WANotifier, that offers 0% markup and transparent pricing.
Do I need user consent before sending WhatsApp messages from Gravity Forms?
Yes. Your website’s privacy policy or terms should clearly state that by submitting a form, users agree to receive WhatsApp messages. This is considered a valid opt-in under WhatsApp’s guidelines.